African Violet Care Guide
Streptocarpus ionanthus
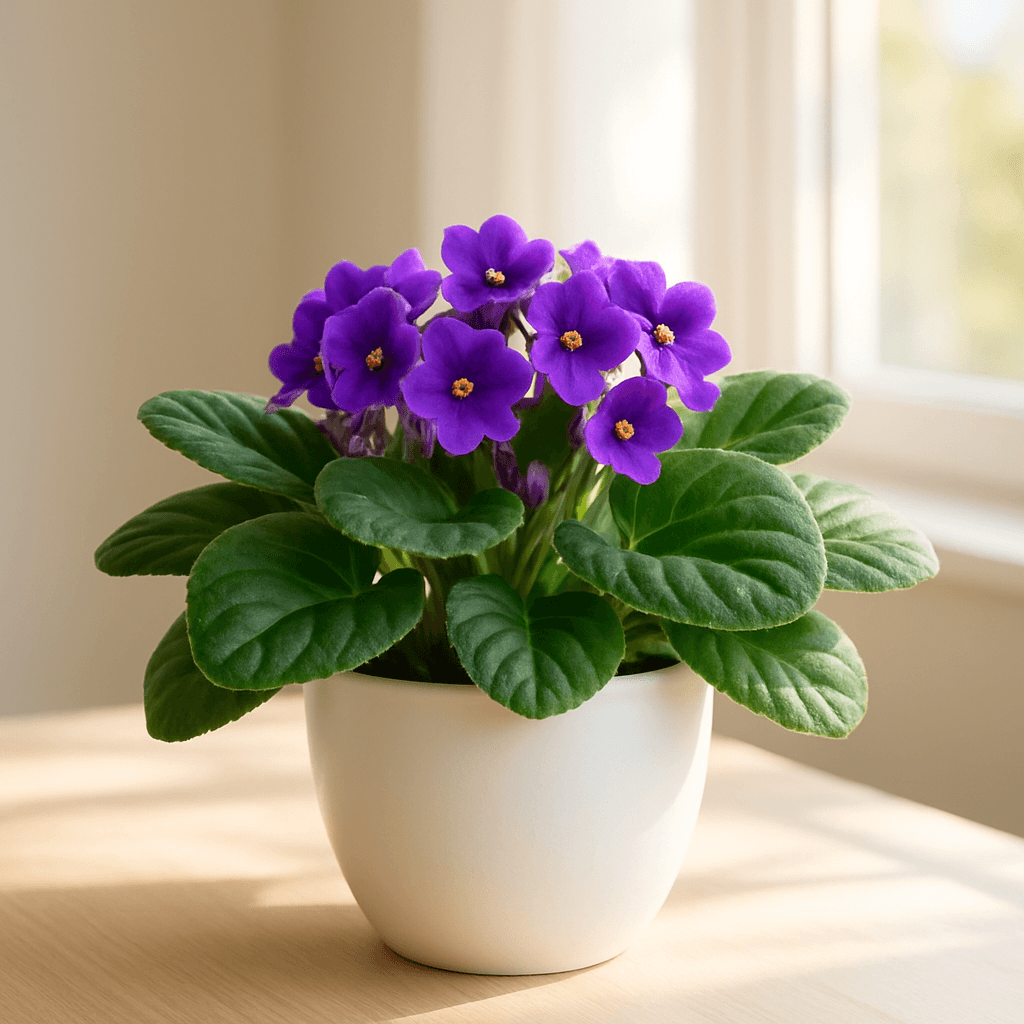
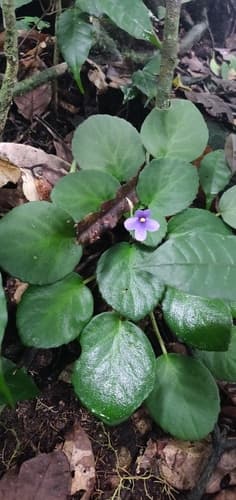
Quick Answer
The number one way people kill African violets is splashing water on the leaves or crown — it causes brown spots, rot, and collapse surprisingly fast. Always water from the bottom, use room-temperature water, and keep the leaves bone dry. Get that right, and everything else about this plant is manageable.
⭐Difficulty
Moderate
☀️Light
Bright indirect
💧Watering
Every 1 week
🌫️Humidity
Medium–High (50–60%)
🌡️Temperature
60–75°F
📈Growth Rate
Moderate
Toxicity
Source: ASPCA Animal Poison Control
Watering
Summer
Every 1 week
Winter
Every 1–2 weeks
Method: Bottom watering preferred; keep leaves dry
Bottom-water only. Set the pot in a saucer or basin with about an inch of room-temperature water and let it sit for 30 minutes — the soil wicks up what it needs. Then lift the pot out and let it drain completely before setting it back in place. Never let it sit in standing water indefinitely, or you'll trade leaf rot for root rot. In summer, water roughly once a week. In winter, stretch that to every 1–2 weeks since growth slows and the soil stays wet longer. Before watering, stick your finger about half an inch into the soil — if it still feels damp, wait another day or two. Overwatering looks like soft, mushy stems at the base and yellowing lower leaves. Underwatering shows up as limp, slightly crispy leaves that perk back up quickly once you water. The most reliable signal is the weight of the pot — a dry pot feels noticeably lighter. One thing people overlook: always use room-temperature water. Cold water straight from the tap is a direct cause of the brown leaf spots that drive so many growers crazy.
Light Requirements
Bright indirect
African violets need bright indirect light to bloom consistently — an east-facing windowsill is ideal, or a spot 2–3 feet back from a south or west window where direct rays won't hit the leaves. If your windows are limited or you want year-round blooms without guessing, a dedicated African violet grow light (set 12–14 inches above the plant on a 12-hour timer) takes all the variability out of the equation.
Soil & Potting
Soil: African violet potting mix
Pot: Small pot (1/3 the diameter of leaf spread); self-watering ideal
Temperature & Humidity
Temperature: 60–75°F (16–24°C)
Humidity: Medium–High (50–60%)
Fertilizing
Frequency: Every 2 weeks spring/summer; monthly winter
Type: African violet fertilizer (high phosphorus)
Common Problems
No blooms
If your African violet is producing healthy leaves but no flowers, it's almost always a light problem. Move it to a brighter spot — an east windowsill or under a grow light — and switch to a high-phosphorus African violet fertilizer, which is specifically formulated to trigger blooming. Give it 4–6 weeks after the change before expecting results; blooming takes energy the plant needs time to build.
Yellow leaves
Yellow leaves on an African violet usually mean too much direct sun is hitting the foliage. Move the plant a foot or two further from the window, or shift it to a north or east-facing exposure where the light is bright but never direct. Once you've moved it, new growth should come in a normal deep green — the existing yellow leaves won't recover, but they'll tell you the problem is solved by stopping.
Brown spots on leaves
Those crispy brown spots that seem to appear out of nowhere are almost always caused by cold water landing on the leaves — even a few drops from a watering can. Switch to strict bottom-watering with room-temperature water and the spots will stop appearing. The existing spots won't disappear, but new leaves will come in clean.
Mushy crown
A soft, collapsing center is crown rot, and it happens when water sits in the middle of the plant — usually from top-watering or misting. If you catch it early, remove any visibly rotted tissue with clean scissors, let the crown dry out for a day or two in good airflow, and switch immediately to bottom-watering only. Severe crown rot is usually fatal, so this one is worth preventing rather than treating. ---
Propagation
African violets are one of the most satisfying plants to propagate because a single healthy leaf can give you a whole new plant. Snap off a healthy, mature leaf from the outer ring of the plant — not a tiny young one from the center — and trim the petiole (the stem) to about 1–1.5 inches. Push the petiole into a small pot of moist African violet mix at a 45-degree angle, cover loosely with a clear plastic bag to hold humidity, and set it somewhere bright and warm. In 6–8 weeks, tiny plantlets will emerge at the base of the petiole. The thing that trips most people up: they pull the new plantlets apart too early. Wait until each one has 2–3 of its own leaves before separating them from the mother leaf — rushing this step almost always results in lost babies.
Seasonal Care Calendar
🌸 Spring
This is when African violets shake off any winter sluggishness and start putting on real growth. If your plant has become root-bound or is sitting in old, compacted soil, spring is the right time to repot — fresh African violet mix makes a noticeable difference in how quickly it bounces back. Start fertilizing every two weeks as daylight improves, and you'll often be rewarded with a flush of blooms within a month or two.
☀️ Summer
Growth is active and the plant is working hard, so consistency matters more than anything. Keep watering on schedule, fertilize every two weeks with a high-phosphorus formula, and watch your humidity — African violets prefer 50–60%, so if your home dries out with air conditioning, a small pebble tray with water nearby can help. Avoid placing the plant anywhere that gets hot afternoon sun through the glass.
🍂 Fall
African violets don't go dormant the way many houseplants do, so fall care looks a lot like summer — keep watering, keep fertilizing, and don't let the temperature drop below 60°F near a drafty window. This is a good time to check whether your plant needs repotting before the slower winter months, and to wipe dust off the leaves gently so they can absorb every bit of available light as the days shorten.
❄️ Winter
Days get shorter and natural light drops, which is the most common reason African violets stop blooming in winter — not temperature, not fertilizer, just light. A grow light on a 12-hour timer solves this completely and keeps them blooming straight through December and January. Cut fertilizing back to once a month, water every 1–2 weeks, and keep the plant away from cold windowpanes.